Set up automated builds
Estimated reading time: 16 minutesHow Automated Builds work
Docker Hub can automatically build images from source code in an external repository and automatically push the built image to your Docker repositories.
When you set up automated builds (also called autobuilds), you create a list of branches and tags that you want to build into Docker images. When you push code to a source code branch (for example in GitHub) for one of those listed image tags, the push uses a webhook to trigger a new build, which produces a Docker image. The built image is then pushed to the Docker Hub registry.
Note: You can still use
docker pushto push pre-built images to repositories with Automated Builds configured.
If you have automated tests configured, these run after building but before pushing to the registry. You can use these tests to create a continuous integration workflow where a build that fails its tests does not push the built image. Automated tests do not push images to the registry on their own. Learn more about automated image testing here.

Configure automated build settings
You can configure repositories in Docker Hub so that they automatically build an image each time you push new code to your source provider. If you have automated tests configured, the new image is only pushed when the tests succeed.
Builds can be added to existing repositories, or added when you create a repository.
-
From the Repositories section, click into a repository to view its details.
-
Click the Builds tab.
-
If you are setting up automated builds for the first time, select the code repository service (GitHub or Bitbucket) where the image’s source code is stored. You might redirected to the settings page to link the code repository service.
Otherwise, if you are editing the build settings for an existing automated build, click Configure automated builds.
-
Select the source repository to build the Docker images from.
You might need to specify an organization or user (the namespace) from the source code provider. Once you select a namespace, its source code repositories appear in the Select repository dropdown list.
-
Optionally, enable autotests.
-
Review the default Build Rules, and optionally click the plus sign to add and configure more build rules.
Build rules control what Docker Hub builds into images from the contents of the source code repository, and how the resulting images are tagged within the Docker repository.
A default build rule is set up for you, which you can edit or delete. This default set builds from the
Branchin your source code repository calledmaster, and creates a Docker image tagged withlatest. -
For each branch or tag, enable or disable the Autobuild toggle.
Only branches or tags with autobuild enabled are built, tested, and have the resulting image pushed to the repository. Branches with autobuild disabled are built for test purposes (if enabled at the repository level), but the built Docker image is not pushed to the repository.
-
For each branch or tag, enable or disable the Build Caching toggle.
Build caching can save time if you are building a large image frequently or have many dependencies. You might want to leave build caching disabled to make sure all of your dependencies are resolved at build time, or if you have a large layer that is quicker to build locally.
-
Click Save to save the settings, or click Save and build to save and run an initial test.
A webhook is automatically added to your source code repository to notify Docker Hub on every push. Only pushes to branches that are listed as the source for one or more tags trigger a build.
Set up build rules
By default when you set up automated builds, a basic build rule is created for you.
This default rule watches for changes to the master branch in your source code
repository, and builds the master branch into a Docker image tagged with
latest.
In the Build Rules section, enter one or more sources to build.
For each source:
-
Select the Source type to build either a tag or a branch. This tells the build system what to look for in the source code repository.
-
Enter the name of the Source branch or tag you want to build.
The first time you configure automated builds, a default build rule is set up for you. This default set builds from the
Branchin your source code calledmaster, and creates a Docker image tagged withlatest.You can also use a regex to select which source branches or tags to build. To learn more, see regexes.
-
Enter the tag to apply to Docker images built from this source.
If you configured a regex to select the source, you can reference the capture groups and use its result as part of the tag. To learn more, see regexes.
-
Specify the Dockerfile location as a path relative to the root of the source code repository. (If the Dockerfile is at the repository root, leave this path set to
/.)
Note: When Docker Hub pulls a branch from a source code repository, it performs a shallow clone (only the tip of the specified branch). Refer to Advanced options for Autobuild and Autotest for more information.
Environment variables for builds
You can set the values for environment variables used in your build processes when you configure an automated build. Add your build environment variables by clicking the plus sign next to the Build environment variables section, and then entering a variable name and the value.
When you set variable values from the Docker Hub UI, they can be used by the
commands you set in hooks files, but they are stored so that only users who
have admin access to the Docker Hub repository can see their values. This
means you can use them to safely store access tokens or other information that
should remain secret.
Note: The variables set on the build configuration screen are used during the build processes only and should not be confused with the environment values used by your service (for example to create service links).
Check your active builds
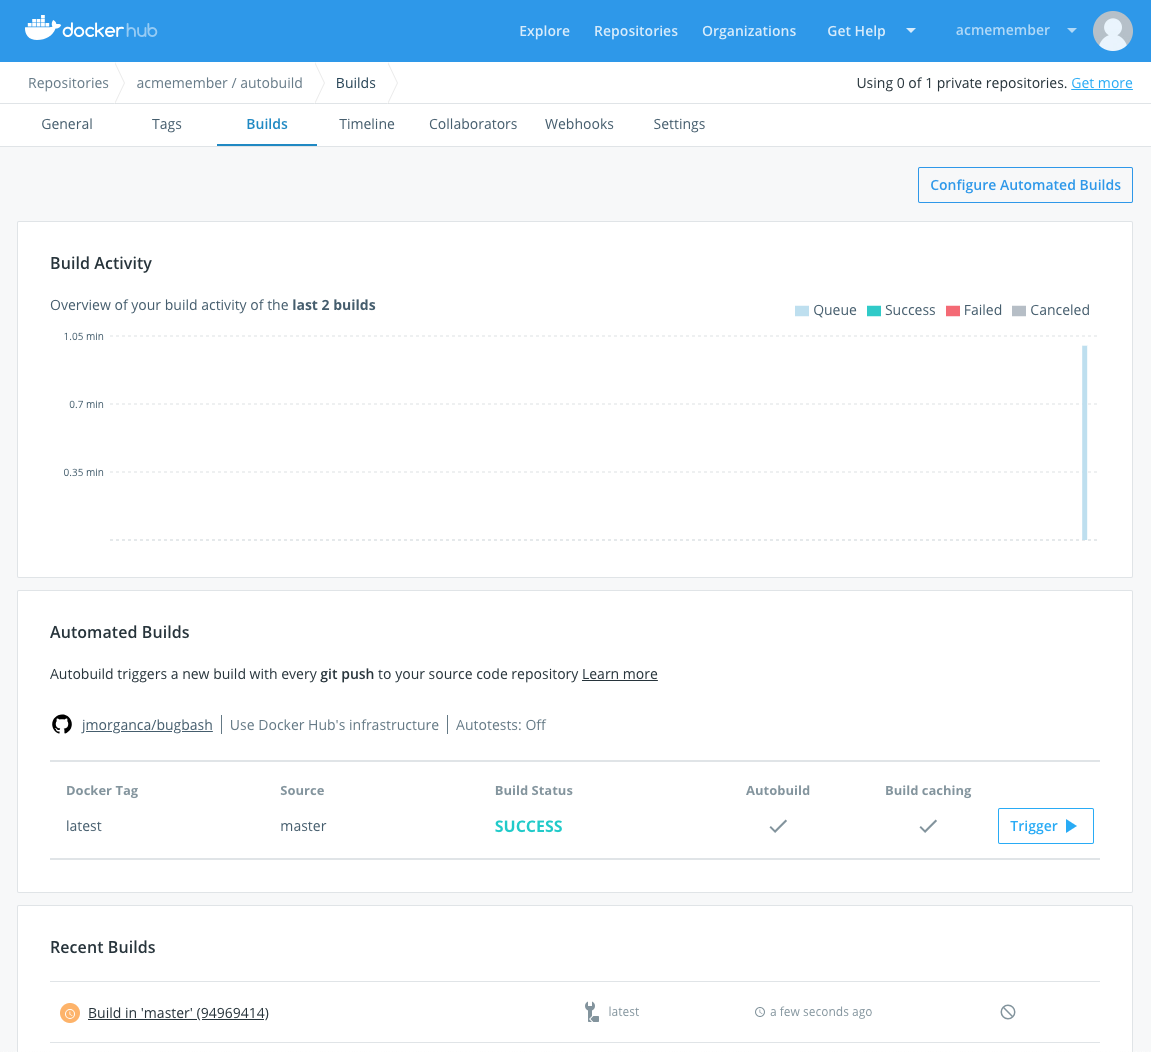
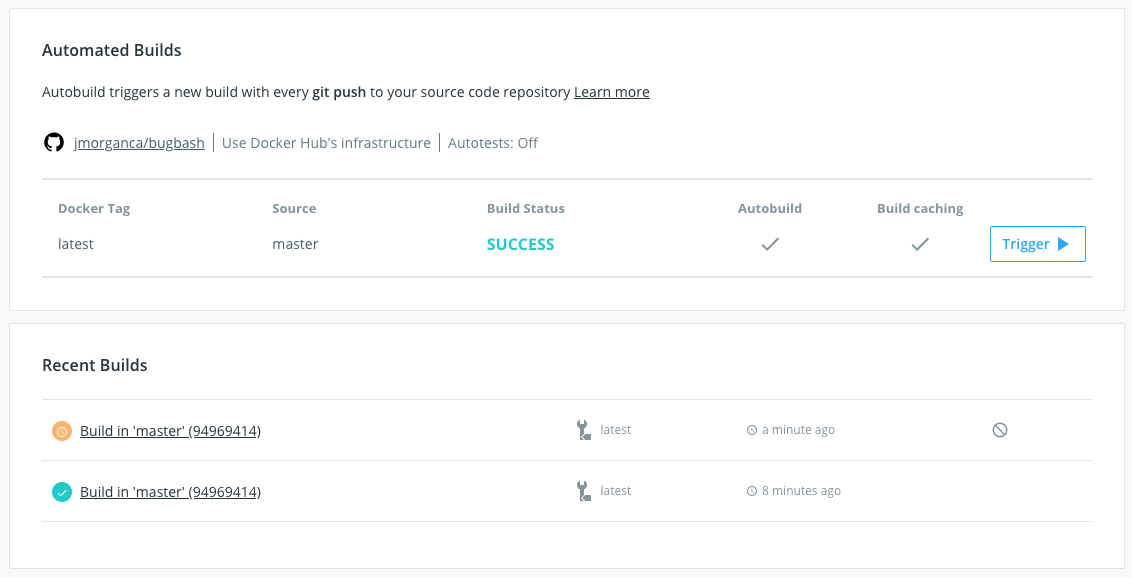
A summary of a repository’s builds appears both on the repository General tab, and in the Builds tab. The Builds tab also displays a color coded bar chart of the build queue times and durations. Both views display the pending, in progress, successful, and failed builds for any tag of the repository.

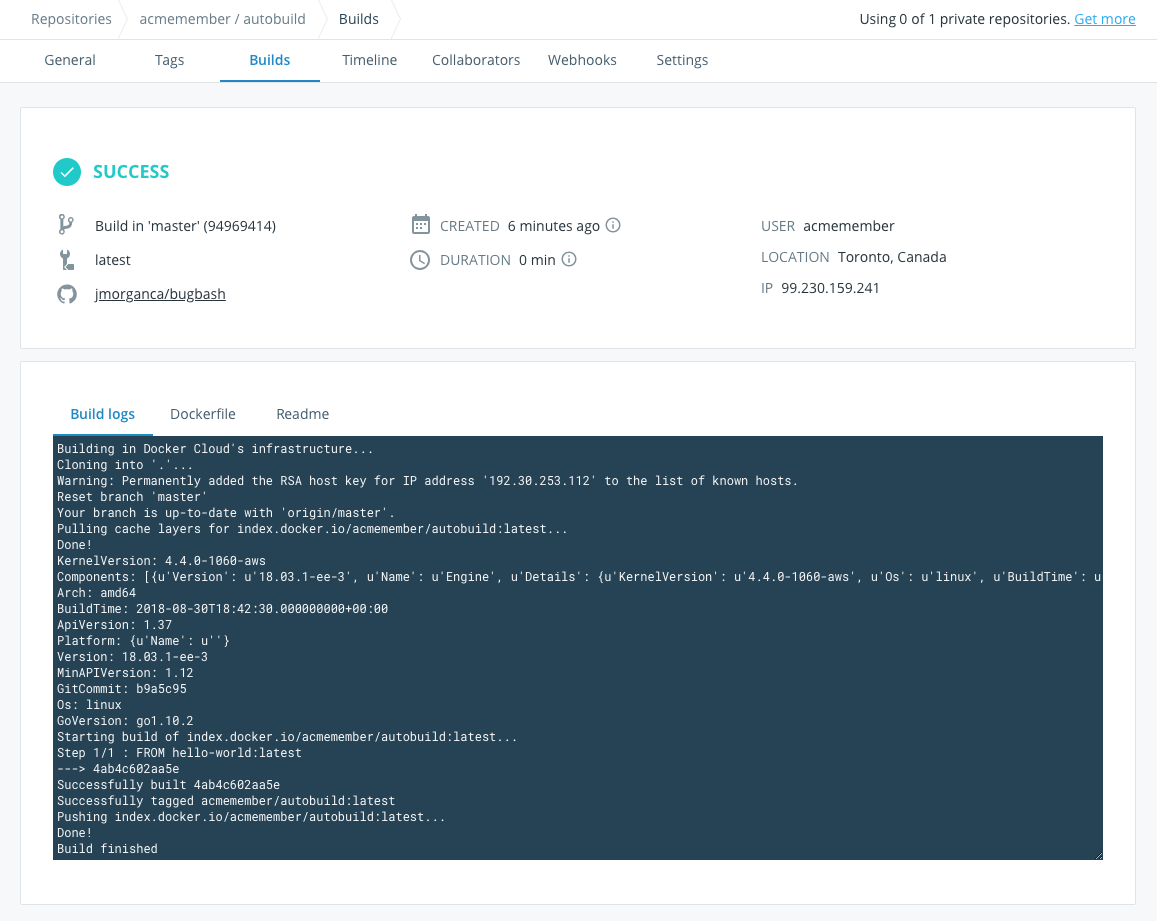
From either location, you can click a build job to view its build report. The build report shows information about the build job including the source repository and branch (or tag), the build duration, creation time and location, and the user namespace the build occurred in.

Cancel or retry a build
While a build is queued or running, a Cancel icon appears next to its build report link on the General tab and on the Builds tab. You can also click the Cancel button from the build report page, or from the Timeline tab’s logs display for the build.
![]()
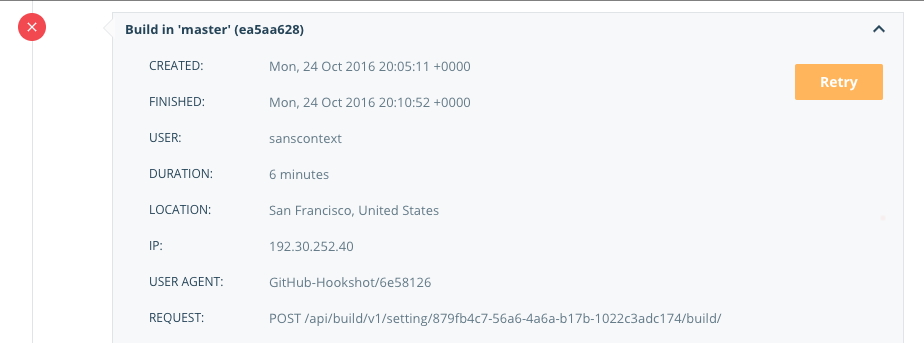
If a build fails, a Retry icon appears next to the build report line on the General and Builds tabs, and the build report page and Timeline logs also display a Retry button.

Note: If you are viewing the build details for a repository that belongs to an Organization, the Cancel and Retry buttons only appear if you have
Read & Writeaccess to the repository.
Disable an automated build
Automated builds are enabled per branch or tag, and can be disabled and re-enabled easily. You might do this when you want to only build manually for a while, for example when you are doing major refactoring in your code. Disabling autobuilds does not disable autotests.
To disable an automated build:
-
From the Repositories page, click into a repository, and click the Builds tab.
-
Click Configure automated builds to edit the repository’s build settings.
-
In the Build Rules section, locate the branch or tag you no longer want to automatically build.
-
Click the autobuild toggle next to the configuration line.
The toggle turns gray when disabled.
-
Click Save to save your changes.
Advanced automated build options
At the minimum you need a build rule composed of a source branch (or tag) and destination Docker tag to set up an automated build. You can also change where the build looks for the Dockerfile, set a path to the files the build use (the build context), set up multiple static tags or branches to build from, and use regular expressions (regexes) to dynamically select source code to build and create dynamic tags.
All of these options are available from the Build configuration screen for each repository. Click Repositories from the left navigation, click the name of the repository you want to edit, click the Builds tab, and click Configure Automated builds.
Tag and Branch builds
You can configure your automated builds so that pushes to specific branches or tags triggers a build.
-
In the Build Rules section, click the plus sign to add more sources to build.
-
Select the Source type to build: either a tag or a branch.
This tells the build system what type of source to look for in the code repository.
-
Enter the name of the Source branch or tag you want to build.
You can enter a name, or use a regex to match which source branch or tag names to build. To learn more, see regexes.
-
Enter the tag to apply to Docker images built from this source.
If you configured a regex to select the source, you can reference the capture groups and use its result as part of the tag. To learn more, see regexes.
-
Repeat steps 2 through 4 for each new build rule you set up.
Set the build context and Dockerfile location
Depending on how the files are arranged in your source code repository, the files required to build your images may not be at the repository root. If that’s the case, you can specify a path where the build looks for the files.
The build context is the path to the files needed for the build, relative to the root of the repository. Enter the path to these files in the Build context field. Enter / to set the build context as the root of the source code repository.
Note: If you delete the default path
/from the Build context field and leave it blank, the build system uses the path to the Dockerfile as the build context. However, to avoid confusion we recommend that you specify the complete path.
You can specify the Dockerfile location as a path relative to the build
context. If the Dockerfile is at the root of the build context path, leave the
Dockerfile path set to /. (If the build context field is blank, set the path
to the Dockerfile from the root of the source repository.)
Regexes and automated builds
You can specify a regular expression (regex) so that only matching branches or tags are built. You can also use the results of the regex to create the Docker tag that is applied to the built image.
You can use up to nine regular expression capture groups
(expressions enclosed in parentheses) to select a source to build, and reference
these in the Docker Tag field using {\1} through {\9}.
Build repositories with linked private submodules
Docker Hub sets up a deploy key in your source code repository that allows it to clone the repository and build it; however this key only works for a single, specific code repository. If your source code repository uses private Git submodules (or requires that you clone other private repositories to build), Docker Hub cannot access these additional repos, your build cannot complete, and an error is logged in your build timeline.
To work around this, you can set up your automated build using the SSH_PRIVATE environment variable to override the deployment key and grant Docker Hub’s build system access to the repositories.
Note: If you are using autobuild for teams, use the process below instead, and configure a service user for your source code provider. You can also do this for an individual account to limit Docker Hub’s access to your source repositories.
-
Generate a SSH keypair that you use for builds only, and add the public key to your source code provider account.
This step is optional, but allows you to revoke the build-only keypair without removing other access.
- Copy the private half of the keypair to your clipboard.
- In Docker Hub, navigate to the build page for the repository that has linked private submodules. (If necessary, follow the steps here to configure the automated build.)
- At the bottom of the screen, click the plus sign ( + ) next to Build Environment variables.
- Enter
SSH_PRIVATEas the name for the new environment variable. - Paste the private half of the keypair into the Value field.
- Click Save, or Save and Build to validate that the build now completes.
Note: You must configure your private git submodules using git clone over SSH (
git@submodule.tld:some-submodule.git) rather than HTTPS.
Autobuild for Teams
When you create an automated build repository in your own account namespace, you can start, cancel, and retry builds, and edit and delete your own repositories.
These same actions are also available for team repositories from Docker Hub if
you are a member of the Organization’s Owners team. If you are a member of a
team with write permissions you can start, cancel, and retry builds in your
team’s repositories, but you cannot edit the team repository settings or delete
the team repositories. If your user account has read permission, or if you’re
a member of a team with read permission, you can view the build configuration
including any testing settings.
| Action/Permission | read | write | admin | owner |
|---|---|---|---|---|
| view build details | x | x | x | x |
| start, cancel, retry | x | x | x | |
| edit build settings | x | x | ||
| delete build | x |
Service users for team autobuilds
Note: Only members of the
Ownersteam can set up automated builds for teams.
When you set up automated builds for teams, you grant Docker Hub access to your source code repositories using OAuth tied to a specific user account. This means that Docker Hub has access to everything that the linked source provider account can access.
For organizations and teams, we recommend creating a dedicated service account (or “machine user”) to grant access to the source provider. This ensures that no builds break as individual users’ access permissions change, and that an individual user’s personal projects are not exposed to an entire organization.
This service account should have access to any repositories to be built, and must have administrative access to the source code repositories so it can manage deploy keys. If needed, you can limit this account to only a specific set of repositories required for a specific build.
If you are building repositories with linked private submodules (private
dependencies), you also need to add an override SSH_PRIVATE environment
variable to automated builds associated with the account.
- Create a service user account on your source provider, and generate SSH keys for it.
- Create a “build” team in your organization.
-
Ensure that the new “build” team has access to each repository and submodule you need to build.
Go to the repository’s Settings page. On GitHub, add the new “build” team to the list of Collaborators and Teams. On Bitbucket, add the “build” team to the list of approved users on the Access management screen.
-
Add the service user to the “build” team on the source provider.
-
Log in to Docker Hub as a member of the
Ownersteam, switch to the organization, and follow the instructions to link to source code repository using the service account.Note: You may need to log out of your individual account on the source code provider to create the link to the service account.
- Optionally, use the SSH keys you generated to set up any builds with private submodules, using the service account and the instructions above.
What’s Next?
Customize your build process
Additional advanced options are available for customizing your automated builds, including utility environment variables, hooks, and build phase overrides. To learn more see Advanced options for Autobuild and Autotest.
Add automated tests
To test your code before the image is pushed, you can use Docker Hub’s Autotest feature which integrates seamlessly with autobuild and autoredeploy.
automated, build, images, Docker HubNote: While the Autotest feature builds an image for testing purposes, it does not push the resulting image to Docker Hub.